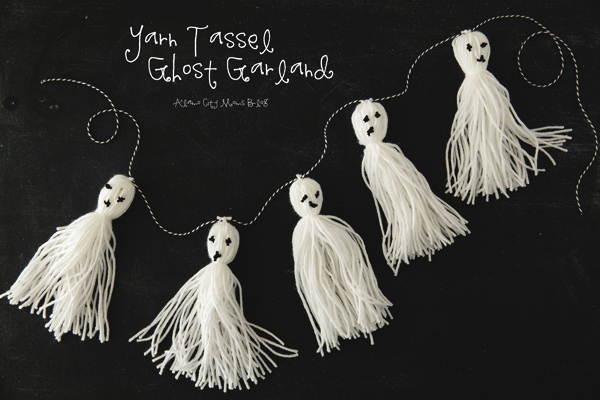
This ghostly garland is super simple to put together and perfect for little hands to help with.
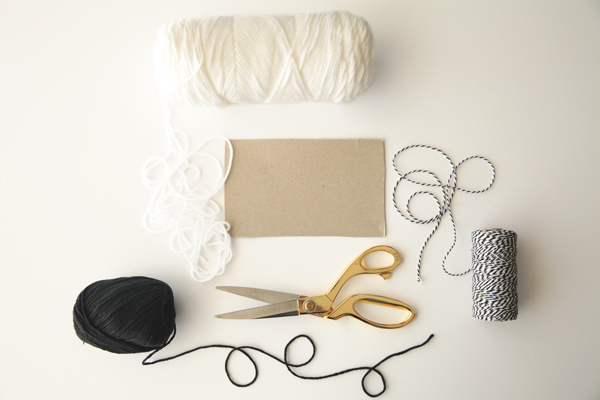
You’ll need white yarn, black yarn, baker’s twine, scissors and something to wrap the yarn around.
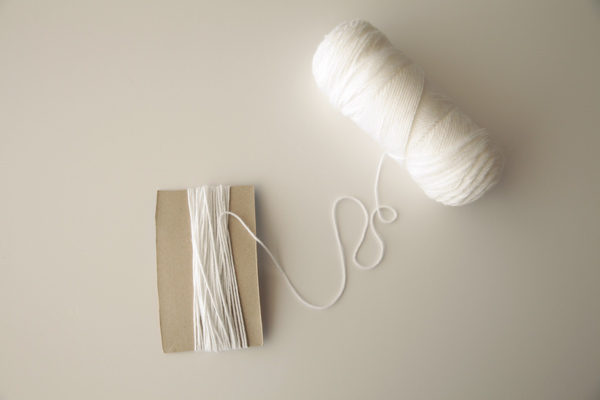
I used the side of an oatmeal box to measure my ghosts – any firm piece of junk mail or ceareal box will do for the job. The length of the piece of cardboard will be the finished height of your ghost. Start by wrapping the yarn lengthwise on the cardboard (or junk mail or whatever you have laying around your house) firmly but not too tightly. Each of my ghosts was wrapped about 40 times – but just eyeball it for how full you want the ghosts to be.
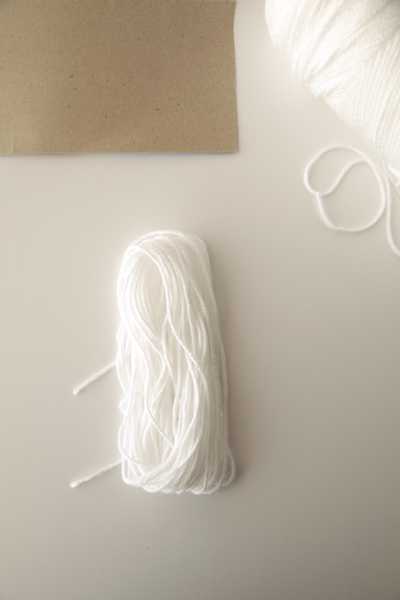
Slide the yarn gently off your form and keep the loops separate.
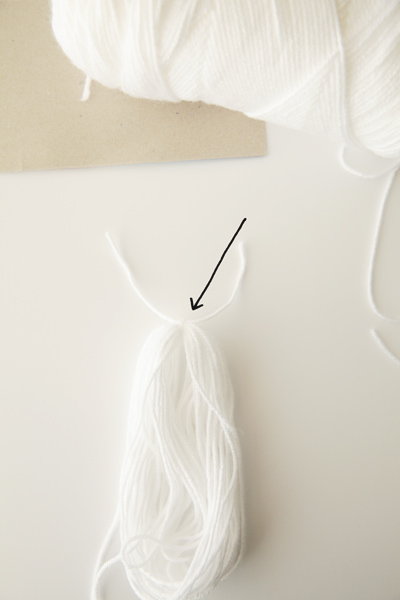
Use a 6 inch-ish piece of yarn to tie the tops of the loops together. This will be at the top of the ghost head and will be how you attach the ghost to the baker’s twine to hang.
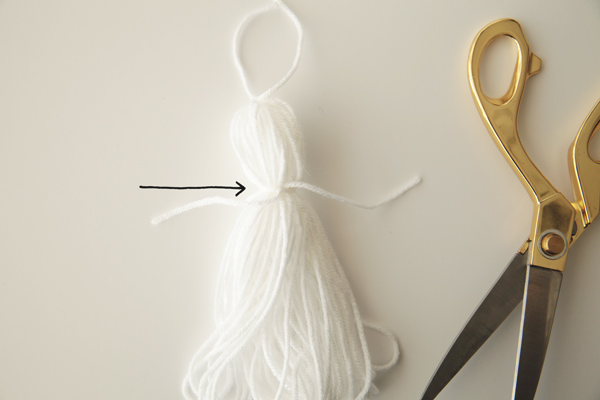
Then form the ghosts “neck” with another piece of yarn knotted about 2-2.5 inches below the top knot. You can trim those pieces or just let them blend in with the rest of the tassel.
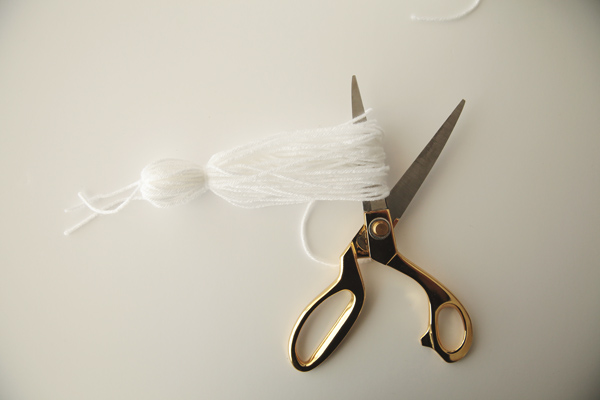
Carefully slide your scissors through the loops and cut them apart so they hang freely.
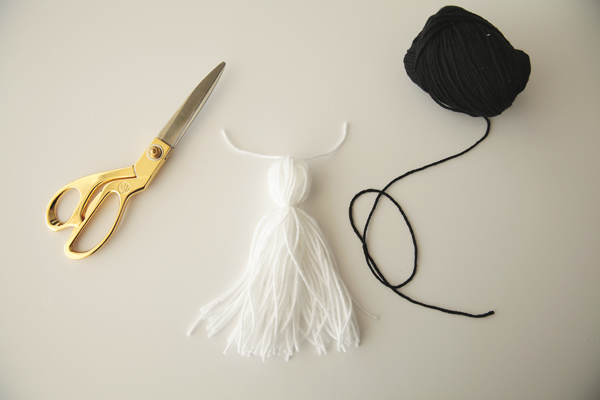
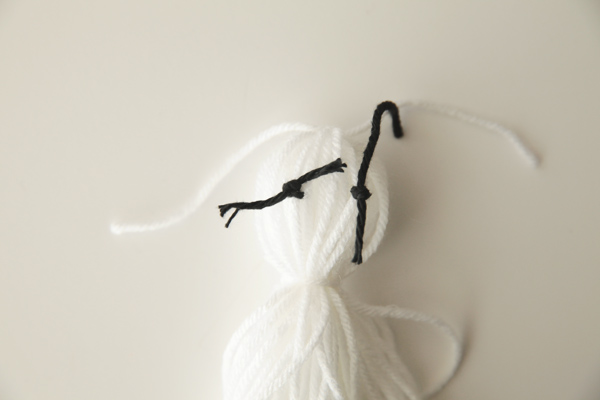
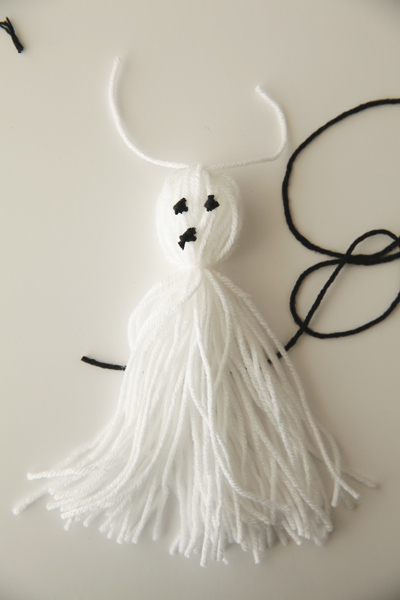
Next, create the ghost’s face with three small pieces of black yarn. Google eyes, felt, or even a sharpie or paint could work for this step, too.
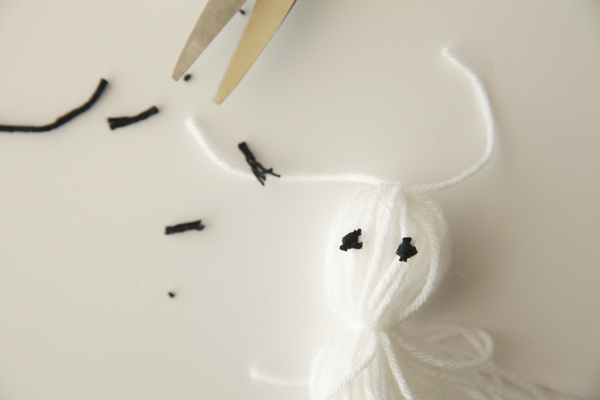
Tie knots for the eyes about 1/3 of the way down the “face”.
Trim the excess while taking care to not trim the knot.
Then repeat for the mouth.
Use the yarn tails at the top of the head to attach the ghost to the baker’s twine (or yarn or ribbon or even fishing line) spacing the ghosts evenly apart. You’re sure to find a place in your house for these spooky friends while decorating for Halloween this year! Want to see and even spookier ghost decoration? Pop over to Handmade Mood and learn how to create creepy ghost photos!






I’m sure my little ghouls would love this!
Such a cute and simple idea!